Getting Started
Before you begin
If you are starting a fresh project, you can bootstrap it with one of the starting templates:
Add Repository
On your dashboard page, click the "Add Repository" button.

Then Click on the "Connect Github repository" button.
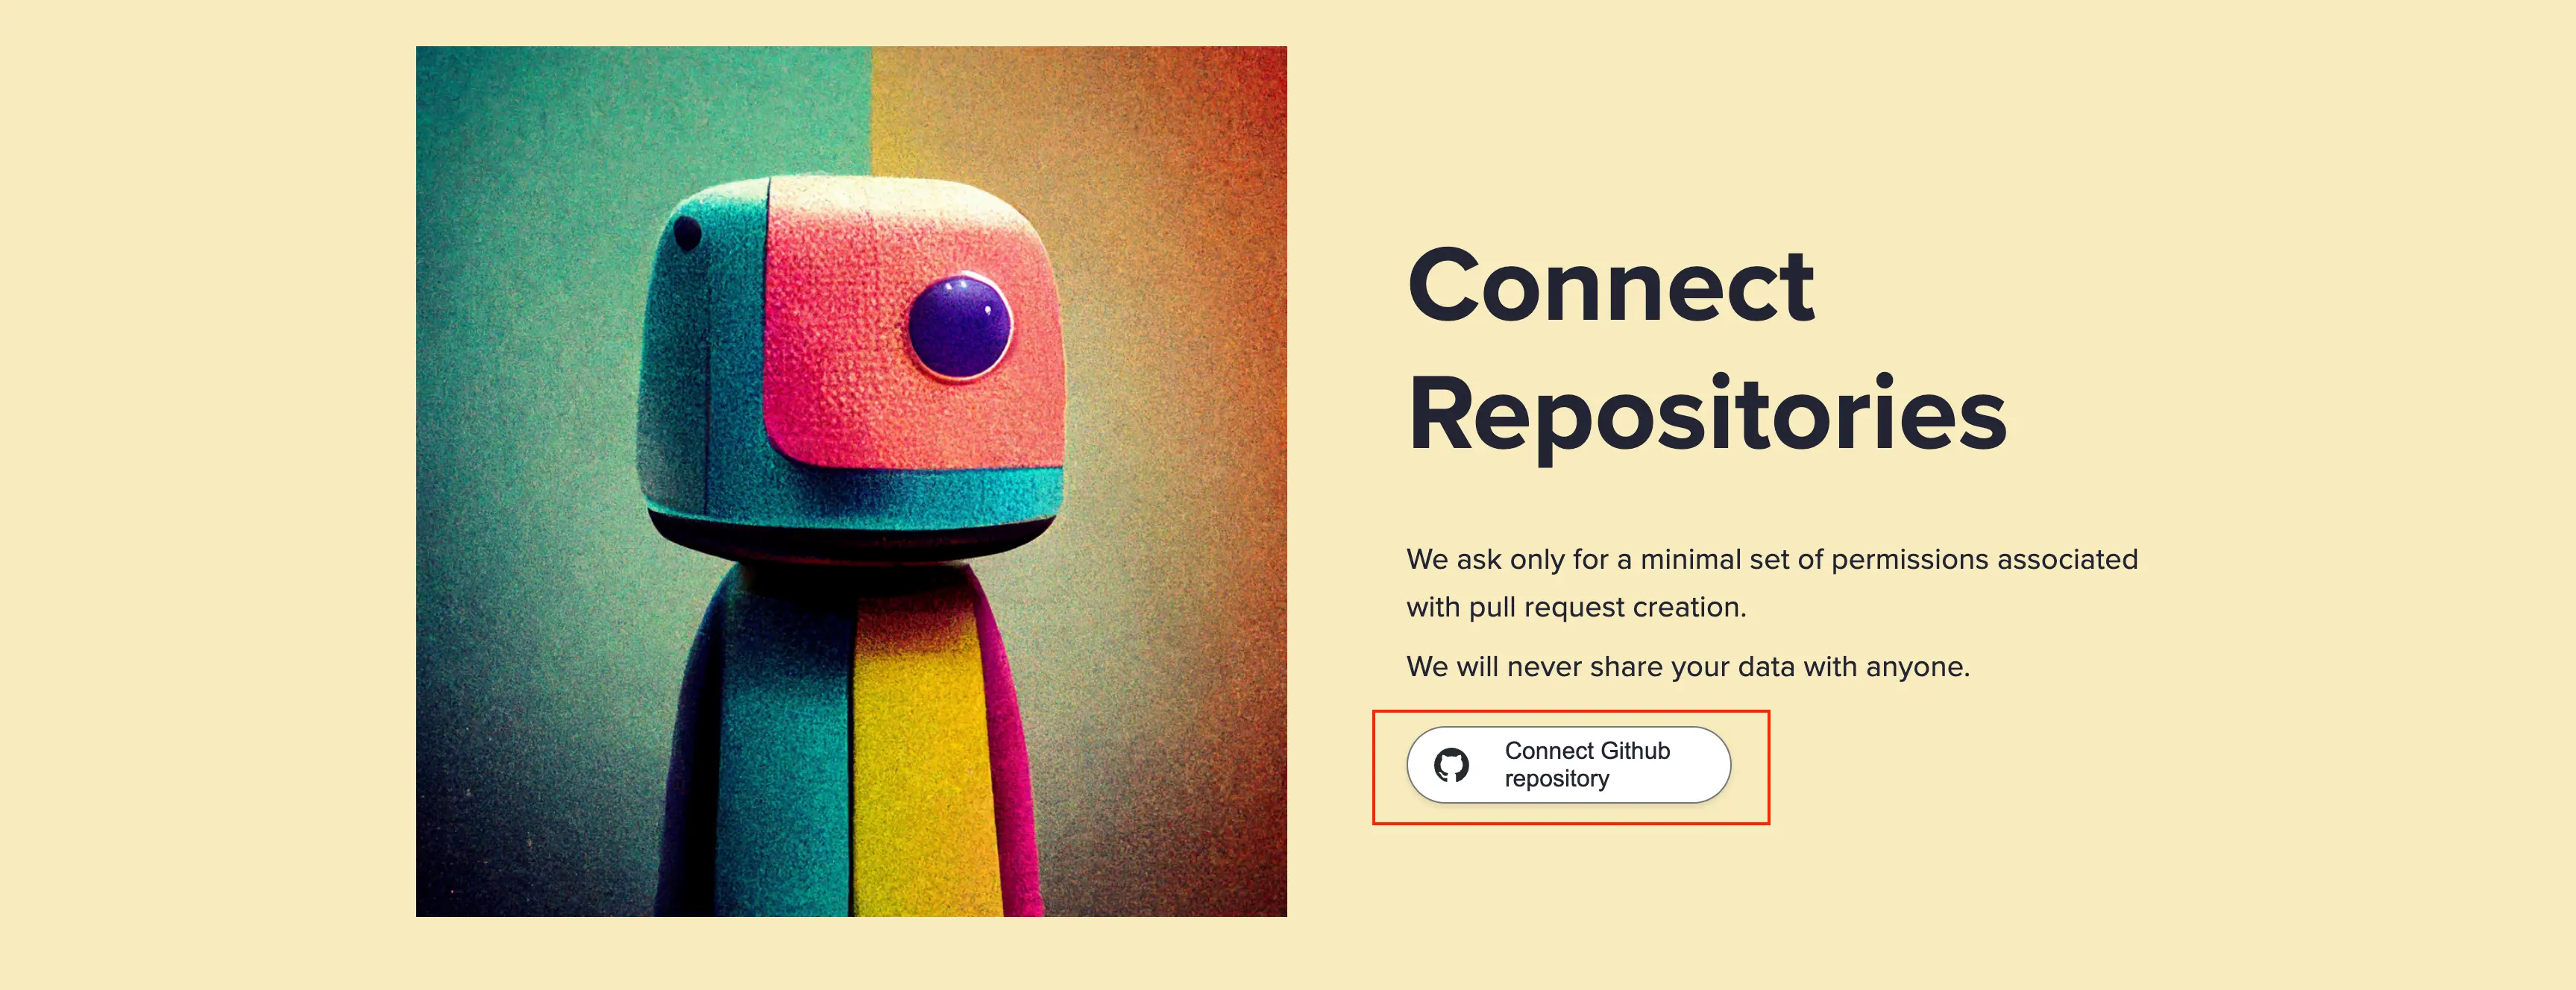
You will then be redirected to the the Github page, where you will choose to which repository you want to give access.
Github Integration
The integration is done in the form of Github App called WriteIt.ai.
We ask only a minimal set of permissions required to create pull requests and read issues.
Security
The communication between WriteIt.ai and Github is done in a secure manner, using short-lived access tokens. We never store any tokens on our side.
Security is at the top of our concerns. The entire system is designed around the principle of least privilege.
Revoking Github Access
You can revoke the granted access at any time.
You would go dashboard -> Add Repository -> Connect Github repository -> and then you would deselect the repository.
Repository Indexing
How to Index a Repository
Once the Github permissions are granted on the Github page, you will be redirected back to WriteIt.ai.
You then need to click on the repository you want to index.
The indexing then automatically starts.

What is Indexing
WriteIt.ai goes through the entire tree of your project - it:
- identifies the applications within (e.g. front-end and back-end applications)
- where the dependency definitions are (e.g. pyproject.toml or requirements.txt)
- it identifies all the functions, classes, and variables, and tries to determine their function and meaning
- it stores all those metadata to databases
Initial Setup
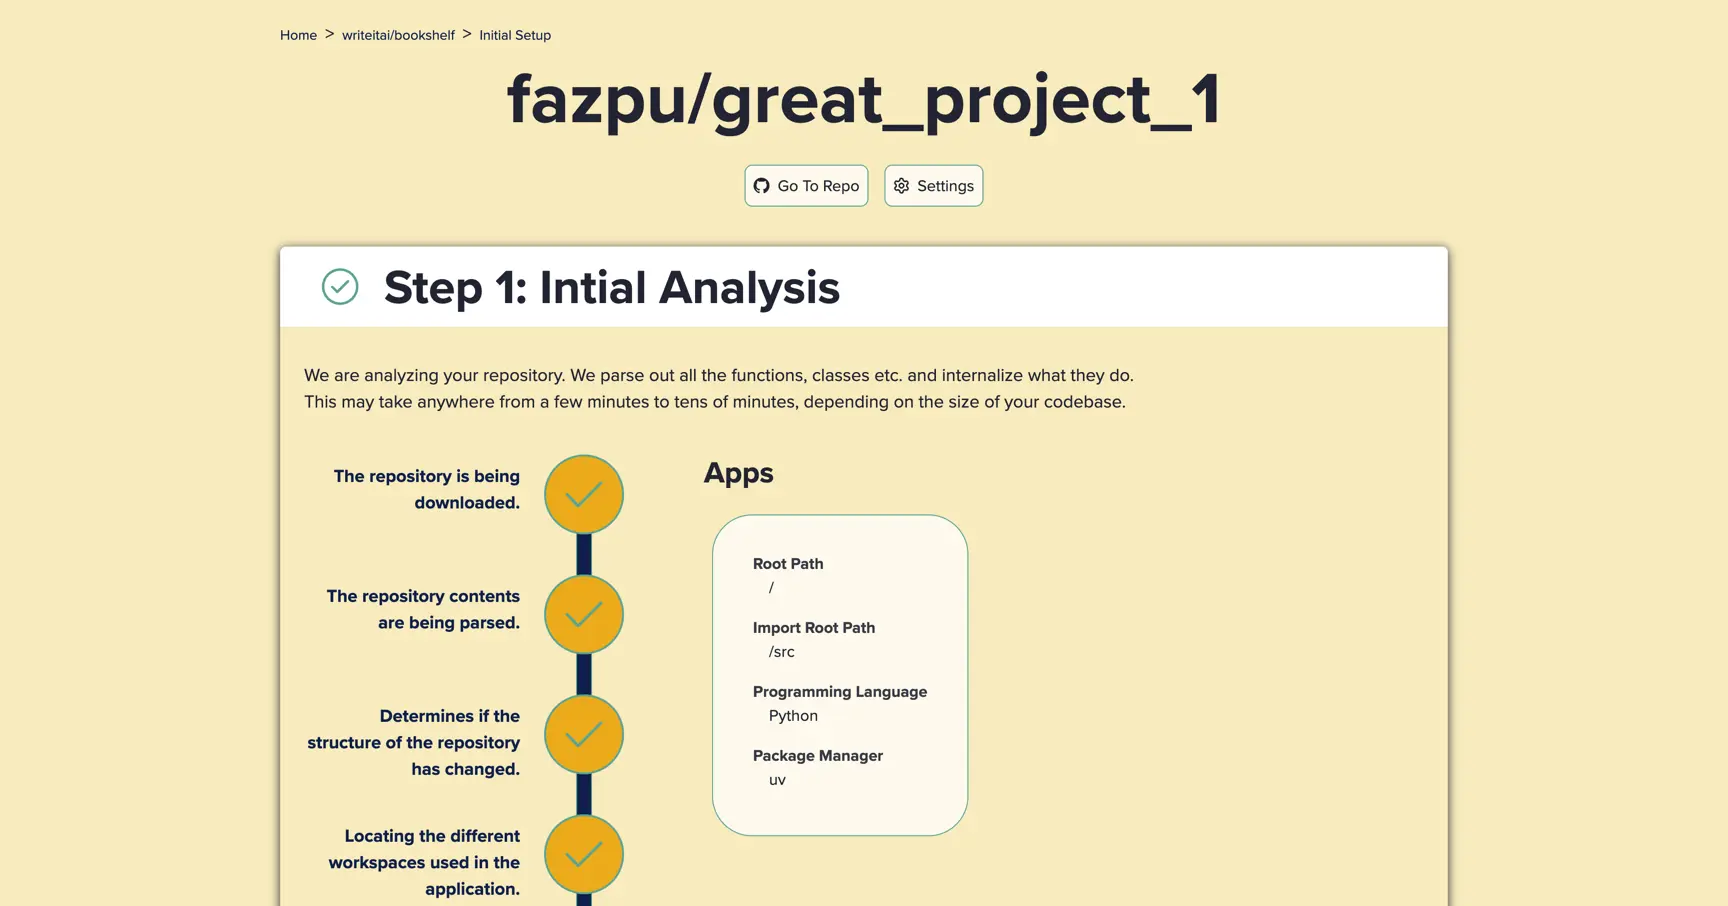
You will see the progress of indexing on the Initial Setup page.
The initial setup has 3 steps:
Analysis of your repository
This is the place where you see how the indexing is progressing.
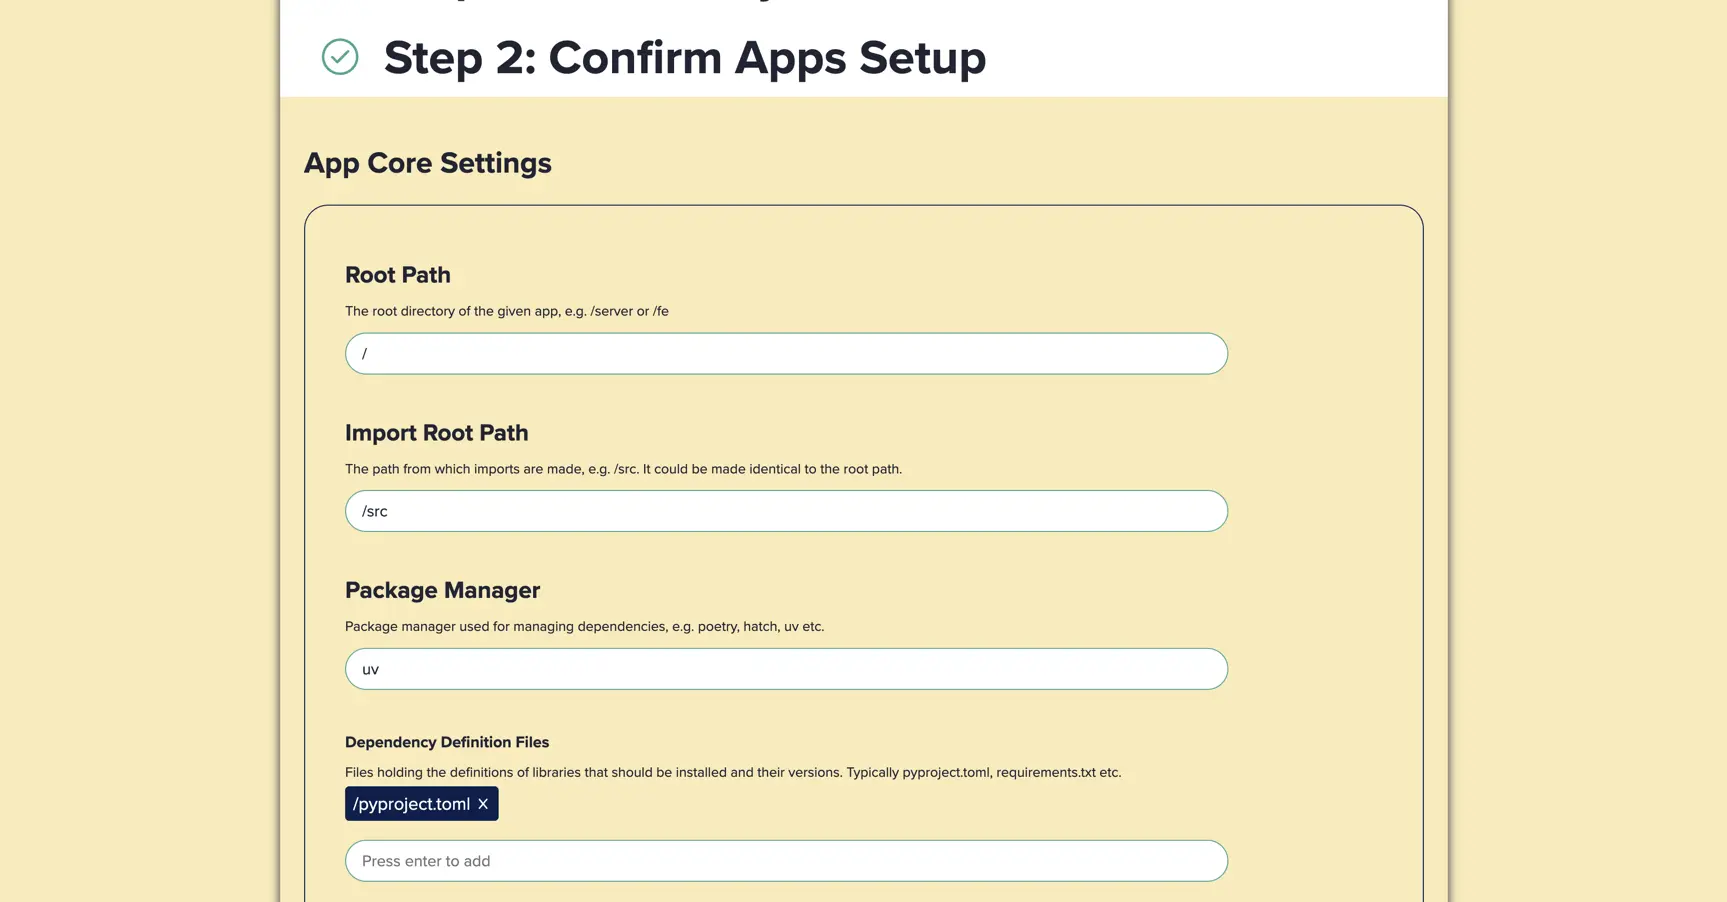
Confirmation of the analysis
You will see what the app has found in your repository. You can confirm or update the information.
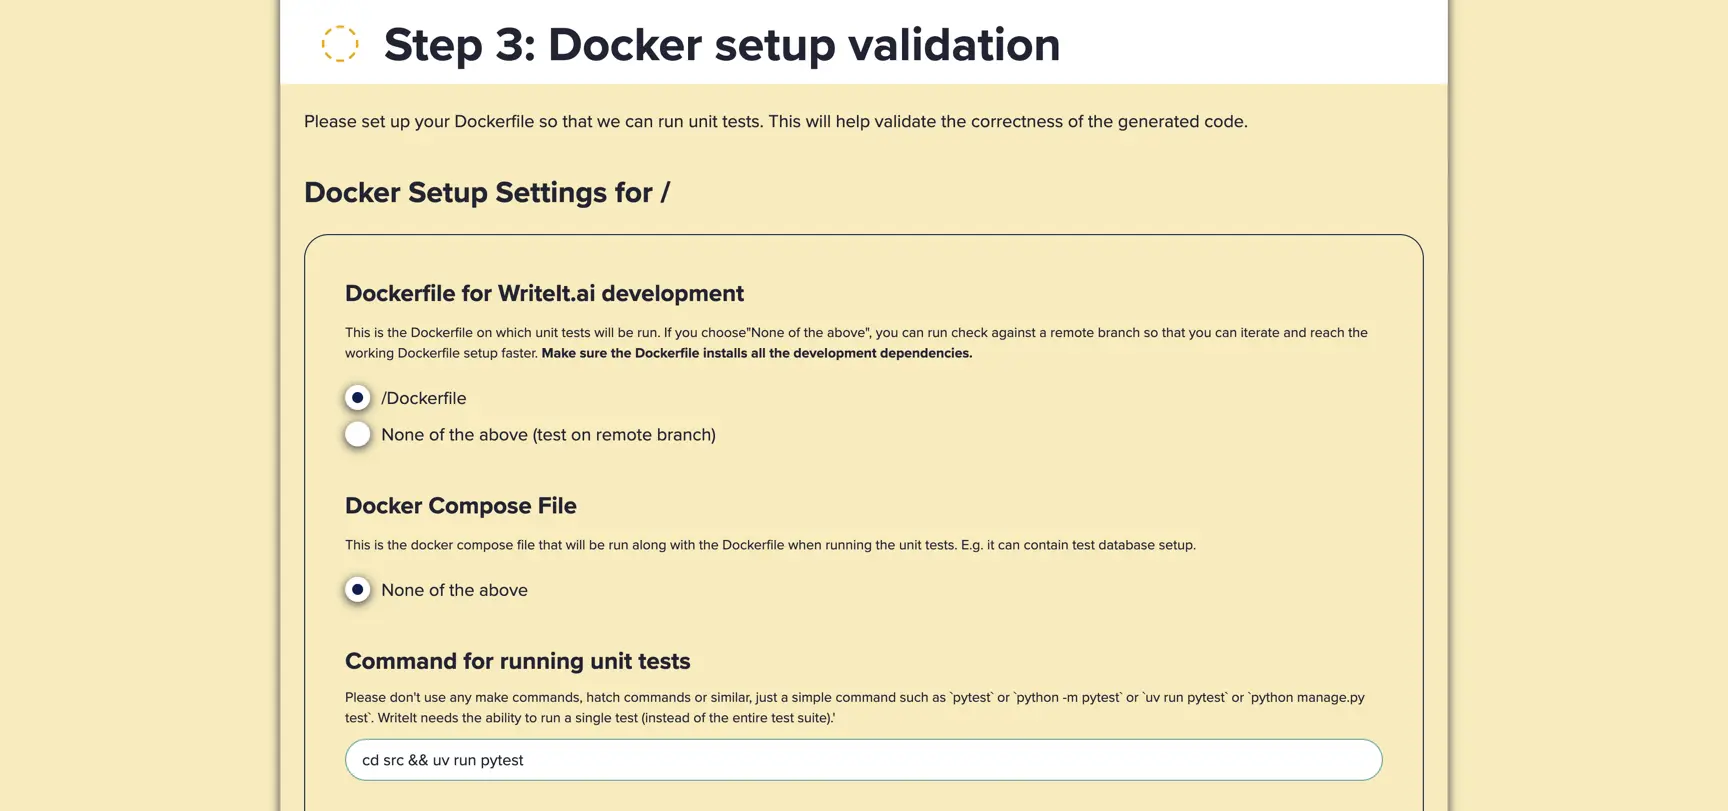
Docker Setup
AI Agents are based on the capabilities of large language models (LLMs). Even the best of them make mistakes. In order to mitigate those, it is important that they have access to validating their outputs.
That is why they must be able to execute the code in the form of unit tests.
In order to do that, you must make sure that you have a Dockerfile that is able to run them.
You can see an example setup values for fastapi-hatch-postgresql repository here.
The fields are:
- Dockerfile for WriteIt.ai development
- The Dockerfile that will be used by WriteIt.ai to run the unit tests.
- Docker Compose File
- You can choose to run Docker compose file as well. This is useful if you have multiple services that need to be run together (e.g. when your unit tests need test database access).
- Command to run unit tests
- The command that will be run in the Docker container to run the unit tests.
Running the docker setup check
After you click the "Test the Setup", it may take several minutes to complete. The setup check will build your docker and run the unit tests. If any of these steps fail, you will be presented with the error message.
Debugging the Dockerfile setup
If your setup passes locally, it should pass on WriteIt.ai as well.
Step 1 - You can first build your image with:
docker build -t my_image .
Step 2 - And then run the tests with:
docker run my_image /bin/sh -c "<Command to run unit tests>"
e.g. the second step could be something like:
docker run my_image /bin/sh -c "uv run pytest"
Example Dockerfile setup
An example of a Dockerfile setup could be following:
uv
FROM python:3.12-slim
# Install uv.
COPY /uv /uvx /bin/
# Copy the application into the container.
COPY pyproject.toml /app/pyproject.toml
COPY uv.lock /app/uv.lock
COPY README.md /app/README.md
# Install the application dependencies.
WORKDIR /app
RUN uv sync --frozen --no-cache --all
COPY ./src ./src
Hatch
# Use a Debian base image with apt-get
FROM python:3.11.9-slim-bookworm

# Install hatch
RUN pip install --no-cache-dir hatch

WORKDIR /app

COPY ./pyproject.toml ./

RUN hatch dep show requirements > ./requirements.txt && \
    pip install --no-cache-dir -r /app/requirements.txt

# Copy the application code into the container
COPY ./src ./src
Pip
# Use alpine image for smallest size
FROM python:3.11-alpine

WORKDIR /app

# Copy and install requirements first (for better caching)
COPY requirements.txt .
RUN pip install -r requirements.txt uvicorn

# Copy only src directory
COPY ./src .